Complete Guide: Why Cleat Position Causes More Knee Pain Than Saddle Height
Quick Answer: Saddle height governs how far your knee extends; cleat position governs the path it travels and how much rotation it is forced into. Because the foot is locked to the pedal, a cleat that is rotated or laterally offset by a few millimetres forces the knee to track off its natural line every single revolution — around 5,000 times an hour. Riders with pain that is medial, lateral, or one-sided should check cleats before touching the saddle.
Everyone knows the saddle height rule. Slight bend at the bottom of the stroke, heel on the pedal, 25 to 35 degrees of knee flexion — it is the first thing anyone tells you and it is the first thing anyone changes.
So you set it correctly, and your knee still hurts. Or it hurts on one side only, which no saddle height explanation covers.
The reason is that saddle height controls one dimension of the knee’s movement, and cleat position controls the other two. Locked into a pedal, your foot cannot make the small accommodations it makes when you walk — so any mismatch between where the cleat puts your foot and where your leg wants it becomes a mismatch your knee has to absorb.

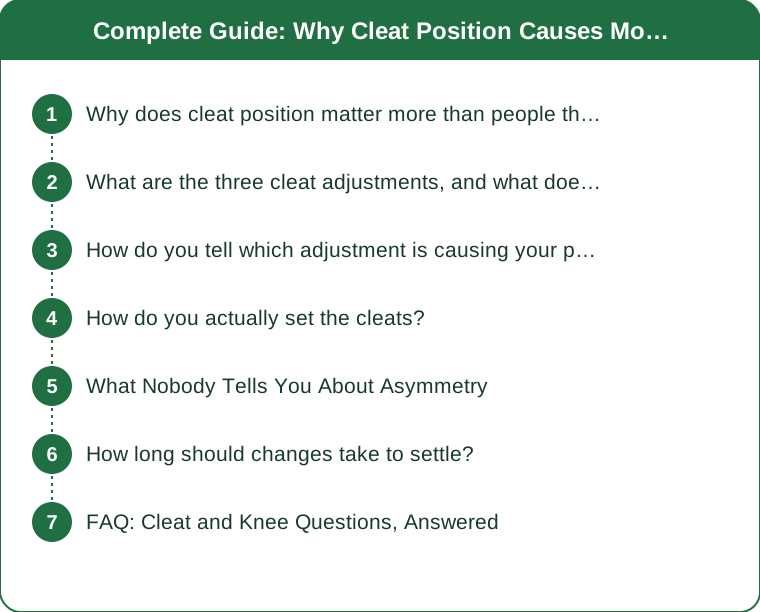
Why does cleat position matter more than people think?
Because clipless pedals remove your body’s ability to self-correct, and then repeat the constrained position thousands of times.
Walking is forgiving. Your foot lands, rotates a few degrees to whatever angle suits your hip and knee that step, and lifts off. Every step is slightly different, and small alignment mismatches are absorbed by that variation.
Clipping in removes all of it. Your foot is now attached at exactly one angle and exactly one position, and it stays there. If that angle does not match the natural rotation of your leg, your knee has to make up the difference — through the joint, on every revolution.
The repetition is the part that matters. At a modest 85rpm, you complete 5,100 revolutions per hour. A two-hour ride is over 10,000 repetitions of the same slightly-wrong movement. Almost no other activity combines that volume with that degree of constraint.
The mechanical reality: the knee is essentially a hinge with limited tolerance for rotation and side-to-side movement. The hip can rotate freely and the ankle has considerable mobility, but the knee sits between them with very little. When the foot is fixed and the hip is doing what it naturally does, the knee is the joint that absorbs the mismatch.
This is why cleat problems produce knee pain rather than foot or hip pain. The pain shows up at the joint with the least tolerance, not at the joint where the error was introduced.
Saddle height, by comparison, controls extension — how straight your leg goes at the bottom of the stroke. Get it wrong and you get a fairly predictable, usually symmetrical pain pattern. Get cleats wrong and you get rotational and lateral stress, which produces the one-sided and side-specific pain that confuses people most.
What are the three cleat adjustments, and what does each do?
Every cleat has three independent settings, and each one drives a different problem.
1. Fore-aft position (how far forward the cleat sits under the foot)
This determines where the pedal axle sits relative to your foot bones. The traditional guidance places the axle under or just behind the ball of the foot — specifically, near the first metatarsal head.
- Too far forward (cleat too far back, foot too far forward on the pedal): increases the leverage your calf has to control, which loads the Achilles and calf, and can produce a bouncing pedal stroke.
- Too far back (foot further back over the pedal): reduces calf load, which many endurance riders prefer, but changes your effective saddle height because your ankle angle changes.
Fore-aft rarely causes knee pain directly. Its main effect on the knee is indirect — it changes effective leg length, so a fore-aft change should always prompt a saddle height re-check.
2. Rotational position (how much the cleat is twisted)
This is the big one for knee pain. It sets the angle your foot points relative to the crank.
Most people’s feet naturally point slightly outward when standing and walking — commonly 5 to 15 degrees, and often different between left and right. If your cleat forces your foot to point straight ahead when your leg wants 10 degrees out, that 10 degrees has to come from somewhere, and it comes from rotation at the knee.
3. Lateral position (how far the cleat sits toward the inside or outside edge of the shoe)
This sets your stance width — the distance between your two feet. Combined with pedal spindle length, it determines whether your knees track in a straight line or angle inward or outward on each stroke.
Too narrow and knees tend to track outward at the top of the stroke. Too wide and they tend to collapse inward. Both produce lateral tracking stress on the kneecap.
How do you tell which adjustment is causing your pain?
The location of the pain maps onto the adjustment fairly reliably. This is the most useful diagnostic tool available and it costs nothing.
Pain at the front of the knee, around or under the kneecap:
Most commonly saddle height too low, or fore-aft position too far forward. Also frequently a cadence issue — grinding a big gear at low rpm loads the front of the knee substantially more than spinning.
Check first: saddle height, then cleat fore-aft, then gearing habits.
Pain on the inside (medial) of the knee:
Usually the knee is tracking inward. Common causes are stance width too narrow, or the cleat rotated so the toe points too far inward.
Check first: cleat rotation, then lateral position — try moving the cleat toward the inside of the shoe, which moves your foot outward and widens your stance.
Pain on the outside (lateral) of the knee:
Usually the knee is tracking outward, or there is IT band involvement. Common causes are stance width too wide, cleat rotated so the toe points too far outward, or saddle too high.
Check first: cleat rotation and lateral position, then saddle height.
Pain behind the knee:
Almost always saddle too high, causing over-extension at the bottom of the stroke. This is the one case where saddle height genuinely is the first thing to check.
Pain on one side only:
This is the signature of a cleat problem, and it is the pattern that most reliably means the saddle is not your issue. Saddle height is symmetrical; cleat setup is not, and neither are your legs. Leg length differences, differing natural foot rotation, and old injuries all produce asymmetric requirements that a symmetrically-set-up bike cannot meet.
How do you actually set the cleats?
Work in order, change one thing at a time, and mark everything before you touch it.
Before you start: take a photo of the current cleat position and draw around the cleat outline on the sole with a fine marker. If a change makes things worse, you need to be able to get back.
Step 1: Find your natural foot angle.
Sit on a table with your legs hanging free, completely relaxed. Look at where your feet naturally point. That angle is what your cleat rotation should reproduce. Note them separately — asymmetry here is normal and important.
An alternative test: stand up, close your eyes, jump lightly and land. Look at where your feet landed. That is your natural stance and angle without conscious correction.
Step 2: Set fore-aft.
Find the bony bump on the inside of your foot behind the big toe — the first metatarsal head. Mark its position on the outside of the shoe. Set the cleat so the pedal axle sits directly under that mark, or up to 10mm behind it. Further back is increasingly favoured for longer rides.
Step 3: Set rotation to match step 1.
Then use float. Most cleat systems offer 4 to 9 degrees of rotational float, and float is not a substitute for correct setup — it is a tolerance band around it. Setting the cleat wrong and relying on float means you spend the whole ride at the edge of the float range, which is the same as having none.
If you are currently on zero-float cleats and have knee pain, switch to a float version before adjusting anything else. This alone resolves a meaningful proportion of cycling knee pain.
Step 4: Set lateral position.
Start with the cleat centred. Ride, and have someone film you from directly in front at a steady cadence.
- Knees tracking inward at the top of the stroke: move cleats toward the inside of the shoe (widens stance).
- Knees tracking outward: move cleats toward the outside (narrows stance).
Move in 2mm increments. This is a small adjustment with a large effect and it is easy to overshoot.
Step 5: Re-check saddle height.
Any fore-aft change alters your effective leg length. Re-check.
What Nobody Tells You About Asymmetry
Your legs are not the same, and a symmetrical bike setup is a compromise that favours one of them.
Leg length differences are extremely common — small discrepancies are the norm rather than the exception, and most people have no idea they have one. On a bike, where both feet are attached to cranks of identical length, a leg length difference means one leg is over-extending or the other is under-extending on every stroke.
Natural foot rotation frequently differs between sides, sometimes by several degrees. Setting both cleats to the same angle guarantees that one foot is wrong.
Old injuries leave lasting asymmetries in hip rotation and ankle mobility that the bike cannot accommodate on its own.
The practical consequence: if you have pain on one side only, and you have set both cleats identically, you have found your problem. Cleats should be set independently, per foot, to what that foot actually wants.
What to do about a genuine leg length difference:
- Small differences are usually handled with float and are not worth intervening in.
- Moderate differences can be addressed with a shim under the cleat on the shorter side, in 1 to 3mm increments.
- Larger differences are worth a professional fit rather than a self-managed fix, because the correction interacts with saddle height, hip position, and often with which side is actually shorter — functional and structural discrepancies need different handling.
The other asymmetry nobody mentions: most riders push harder with one leg. A power meter that measures both sides independently will typically show a 45/55 split or thereabouts, and that is normal. It only becomes a problem when combined with a setup error on the dominant side, because the stronger leg is applying more force through a worse alignment.
How long should changes take to settle?
Longer than most people allow, and the settling period is where most riders make their second mistake.
The adaptation timeline:
- First ride after a change: often feels strange regardless of whether the change was correct. Do not judge anything on a single ride.
- Two to three rides: the new position starts feeling normal. Pain that was position-related usually begins easing here.
- Two weeks: enough to know whether a change helped. Tissue that was irritated needs time to settle even after the cause is removed.
The critical rule: change one variable at a time. If you adjust rotation and lateral position and saddle height in one session and the pain improves, you have learned nothing about which one mattered, and you cannot repeat it on your other bike.
Reduce your volume for the first week after any change. A new position uses slightly different muscle recruitment, and going straight into your longest ride of the month on a changed setup produces soreness that is indistinguishable from the problem you were trying to fix.
Keep a note. Date, what you changed, how much, and how the knee felt at 20, 60, and 120 minutes. Bike fit is genuinely iterative and memory is unreliable across weeks.
When to stop self-adjusting and get a professional fit:
- Pain that persists after two properly-tested cleat positions
- Any swelling, locking, giving way, or clicking with pain
- Pain that is present off the bike, on stairs, or at rest
- A known leg length difference of more than a few millimetres
This is general information, not medical advice. Persistent knee pain deserves assessment rather than continued experimentation — bike fit is frequently the answer, but not always, and a knee that hurts walking up stairs is telling you something the bike did not cause.
FAQ: Cleat and Knee Questions, Answered
Is more float always better?
No. Float allows your foot to find its own angle, which helps when the setup is approximately right. Excessive float on a rider with poor control can allow the knee to track badly through the whole range, which is its own problem. Moderate float with correct positioning beats maximum float with guessed positioning.
Do I need a professional bike fit?
For most riders with mild discomfort, careful self-adjustment resolves it. A professional fit is genuinely worth it if you have persistent one-sided pain, a known leg length difference, are riding high volume, or have tried the adjustments above without success. The value is largely in the measurement of things you cannot see yourself.
Should the cleats be the same on both shoes?
Almost certainly not. Set each foot to what that foot naturally does. Identical setup is a convenience, not a principle, and it is one of the most common causes of one-sided pain.
Can flat pedals fix knee pain?
Often, temporarily — they remove the constraint entirely and let your foot self-correct. That makes them a useful diagnostic: if pain disappears on flat pedals, your cleat setup is strongly implicated. It is a good test and a reasonable option for shorter rides.
Does cadence matter as much as position?
For anterior knee pain, close to it. Low cadence at high force loads the front of the knee substantially. If you habitually ride below 70rpm and have front-of-knee pain, raising cadence toward 85 to 90 is worth trying alongside any position change — though remember the one-variable-at-a-time rule.
TL;DR: Saddle height sets how far the knee extends. Cleats set where it travels — and that is where most persistent pain comes from.
- Clipless pedals remove your foot’s ability to self-correct, then repeat the constrained position over 5,000 times an hour.
- Pain location tells you what to check: front = saddle height or fore-aft, inside = stance too narrow, outside = stance too wide, behind = saddle too high, one side only = cleats.
- Set rotation to match your natural relaxed foot angle, per foot. Float is a tolerance band, not a substitute for setup.
- Move lateral position in 2mm increments and film yourself from the front.
- Change one variable, reduce volume for a week, and give it two weeks before judging.
The single most useful realisation is that your legs are not symmetrical, so your cleats should not be either.
Keep Reading
This article is for general informational and styling purposes only. Fit, sizing, and product availability may vary — check current details before purchasing.