Complete Guide: Why Winter Layers Quietly Change Your Bike Fit
Quick Answer: Winter clothing adds bulk at the shoulders, elbows, waist and feet, and thicker shoes change the distance from your foot to the pedal axle. The combined effect is a slightly shorter effective reach, restricted shoulder and hip range, and an effectively raised saddle height. Most riders never adjust for it and instead spend the winter with unexplained knee, neck and hand discomfort. The main fixes are lowering the saddle a few millimetres for thick shoes, checking cleat position after a shoe change, and choosing layers that do not restrict the shoulders.
Every autumn a large number of riders develop a niggle that was not there in August, and every autumn most of them look at the bike. The bike has not changed. What is between them and the bike has.
This is general information, not medical advice.
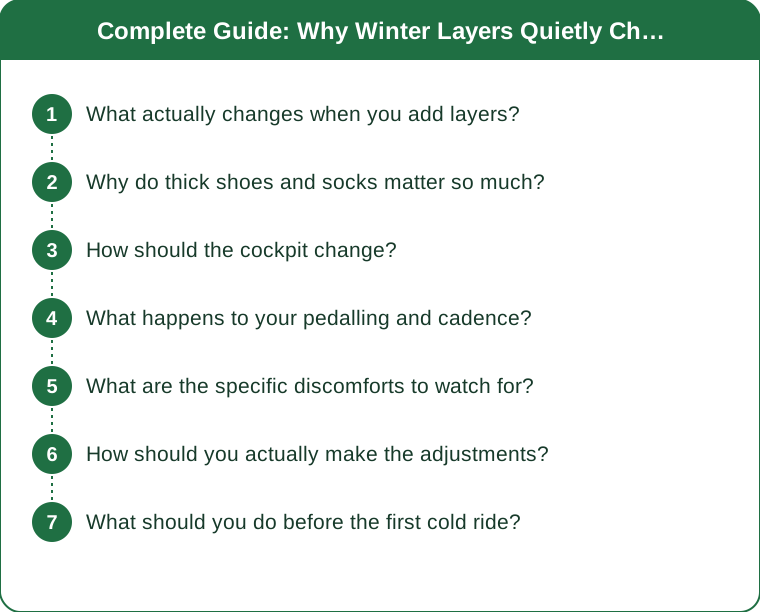
What actually changes when you add layers?
More than the word layers suggests, because clothing does not just insulate — it occupies space and it constrains movement.
Bulk at the torso shortens your effective reach. A summer jersey is a couple of millimetres of fabric. A base layer, a long-sleeve jersey and a jacket can add ten to fifteen millimetres across the chest and back combined, and that sits between you and the handlebars in the sense that it takes up part of the space your torso used to move through. In practice, most riders unconsciously sit a fraction further back or ride slightly more upright, which changes weight distribution on the saddle.
Bulk at the shoulders and elbows restricts range. This matters more than the reach change. A jacket that is comfortable standing up can meaningfully limit how far you can rotate your shoulders forward and how easily you drop to the lower part of the bars. When shoulder range is restricted, riders compensate by rounding the upper back and pushing the head forward, which is the mechanism behind almost every winter neck complaint.
Bulk at the waist restricts the hip. Two or three layers tucked in around the waistband, plus bib tights over a base layer, reduce how freely the hip flexes at the top of the pedal stroke. Riders rarely notice this directly. They notice it as a slightly rocking pelvis, a lower cadence preference, or a vague sense that they are less smooth than in summer.
Thicker gloves change your grip and your controls. A winter glove adds several millimetres between your palm and the bar, and it moves your fingers further from the levers. Riders with smaller hands often end up reaching for brakes in a way they never had to in summer, which loads the wrist and the outside of the hand.
And thicker socks and overshoes change the foot. This is the one with the largest mechanical consequence, and it gets its own section below.
None of these is large on its own. All of them arrive on the same day, usually the first genuinely cold ride of the year, and the combined effect is enough to change how a familiar position feels.
Why do thick shoes and socks matter so much?
Because saddle height is measured to the pedal, and you have just moved your foot away from it.
Your effective saddle height is the distance from the saddle to the foot, not to the pedal surface. Add a thicker sock, a winter shoe with more insulation in the sole, or an overshoe with material under the foot, and you have raised your foot by anywhere from two to six millimetres. Functionally, your saddle just got higher by the same amount.
That sounds trivial. It is not, because saddle height is one of the most sensitive adjustments on a bicycle. Fit changes of a few millimetres are routinely enough to change knee comfort, and riders who have had a professional fit will know that adjustments at this scale are exactly what gets discussed.
A saddle that is effectively too high produces a recognisable set of symptoms: discomfort at the back of the knee rather than the front, a pelvis that rocks side to side at the bottom of the stroke, reaching with the toes, and saddle discomfort that arrives sooner than it used to because you are sliding forward to compensate.
The fix is straightforward and almost nobody does it. Measure the stack height difference between your summer and winter setup, and lower the saddle by that amount for the winter. In practice, three to five millimetres covers most people who move from a summer shoe and thin sock to a winter shoe and thick sock.
There is a second-order effect worth knowing. Thick socks also make the shoe tighter, which reduces circulation in exactly the conditions where you need it most. Cold feet on winter rides are frequently caused by a sock that is too thick for the shoe rather than by insufficient insulation. If your feet get cold with thick socks and not with thin ones, that is what is happening — the answer is a larger winter shoe or overshoes over your normal setup, not more sock.
And if you change shoes entirely for winter, the cleats need checking. Cleat position transferred by eye between two different shoes is routinely several millimetres out, and fore-aft cleat position is a well-known contributor to knee discomfort. Mark the old position carefully, or better, measure from a fixed reference on the shoe.
How should the cockpit change?
Mostly through equipment choice rather than adjustment, because most riders should not be moving their bars seasonally.
Consider the reach to the levers. If winter gloves make braking feel like a stretch, most modern brake levers have a reach adjustment — often a small screw or a grub screw behind the lever blade. Winding it in for the winter and back out in spring takes two minutes and it solves a genuine safety issue, not just a comfort one.
Bar tape can do useful work. A thicker tape or an extra layer of gel under the tape adds cushioning at the exact time of year when cold hands are less tolerant of vibration. It also slightly increases grip diameter, which some riders find helps with cold, stiff hands and others find makes the reach worse. It is cheap enough to try.
Think about where you actually ride in winter. Most people spend far more of a cold ride on the tops or the hoods and much less in the drops, because the position is warmer, more upright and gives better visibility on wet roads. If that is true for you, hood comfort matters more than drop comfort for four months of the year, and it is worth checking that the hoods are positioned well rather than optimising for a position you will barely use.
Do not chase the reach change with a stem swap. The apparent shortening from torso bulk is small, and it is offset by the fact that most riders sit slightly more upright in winter anyway. Changing stem length seasonally introduces more variables than it solves, and you will be undoing it in March.
Mudguards and their consequences are worth a mention here because they change the bike as well as the weather. Fitting guards can require moving to slightly narrower tyres on some frames, and a narrower tyre at the same pressure gives a harsher ride and a different contact patch. If your winter bike feels less comfortable than your summer bike and you have blamed the position, check the tyres before you touch the saddle.
What happens to your pedalling and cadence?
It changes, and understanding why stops you diagnosing it as lost fitness.
Cold muscles produce less power and prefer a lower cadence. Muscle contraction speed and efficiency are temperature dependent, and on a cold start you are working with tissue that is genuinely below its optimal operating temperature for considerably longer than you would think. This is why the first twenty minutes of a cold ride feel disproportionately hard and why power numbers in the first half hour of an autumn ride are routinely well below summer equivalents at the same effort.
Restricted hip range from waist bulk reduces comfortable cadence. If the top of the pedal stroke is slightly constrained, spinning fast becomes less comfortable and riders naturally drift toward a heavier gear at a lower cadence. That in turn increases the force through the knee at the top of the stroke, which is the least favourable place to add force.
Heavier clothing and a heavier bike change the effort profile. Winter kit, mudguards, lights, a fuller saddlebag and heavier tyres can add several kilograms. On the flat that is barely noticeable; on any climb it is entirely noticeable, and it lands as a sense that hills have got harder.
The practical response is to accept a lower cadence early and warm up properly. A longer warm-up matters more in cold weather than in warm, and the first section of a winter ride should be treated as part of the warm-up rather than as ride time. Riders who go hard in the first fifteen minutes of a cold ride are the ones who report knee problems in November.
And check the gearing honestly. If your winter bike has different gearing from your summer bike, which is common, a cadence you find natural on one may not be available on the other at the speeds you ride in winter. That is a straightforward equipment fix rather than a fitness problem.
What are the specific discomforts to watch for?
Winter fit problems present in a fairly consistent set of patterns, and knowing them lets you work backwards to the cause.
Back of the knee, or hamstring tightness
Classically an effectively-too-high saddle. Given that winter shoes and socks raise your foot, this is the most predictable autumn complaint there is. Lower the saddle three to five millimetres and reassess.
Front of the knee
More commonly associated with a saddle that is too low or too far forward, or with pushing heavy gears. In winter it frequently comes from gear choice on cold muscles rather than from the fit itself.
Neck and upper back
Usually restricted shoulder range from a bulky jacket, causing a rounded upper back and forward head position. The fix is almost always the jacket rather than the bike — a cut that allows shoulder rotation matters far more than warmth ratings.
Hands and outer palm
Often reach-to-lever, made worse by thick gloves. Adjust lever reach before adding more bar tape.
Saddle discomfort that arrives earlier than usual
Check whether you are sliding forward, which suggests the effective saddle height changed. Also check the chamois — a winter bib tight has a different pad from a summer short, and pad differences are a genuine and underrated source of seasonal discomfort.
Feet, cold and numb
Almost always too tight rather than too cold. Loosen the shoe, use a thinner sock with an overshoe, and check that you have not compressed the foot to gain insulation.
The general rule for all of these: if a discomfort appeared within a fortnight of the weather turning, look at what you changed about your clothing before you look at the bike.
How should you actually make the adjustments?
Methodically, one at a time, and with a record. This is the part people get wrong even when they identify the right problem.
Write down your summer numbers before you change anything. Saddle height from bottom bracket centre to saddle top along the seat tube, saddle fore-aft relative to the bottom bracket, and saddle-to-bar drop. Photograph the seatpost with a ruler if that is easier. The single most common winter fit disaster is a rider who adjusts sensibly in October and cannot get back to their summer position in April.
Change one thing per ride. Saddle height and cleat position both affect the knee, and changing both together tells you nothing about which one helped. Ride the same familiar route after each change.
Make small changes. Two to three millimetres at a time on saddle height. Larger jumps overshoot and produce a new problem that masks the old one.
Give each change at least two rides. The first ride after any fit change feels different regardless of whether it is better, because you notice the position. The second ride tells you more.
Do the shoe change and the saddle change together, deliberately. These two are genuinely linked, so if you are switching to winter shoes, drop the saddle at the same time and treat it as one change rather than two.
Keep a note of what you did. A photo of a note on your phone is enough. Next autumn you will want to know what worked, and you will not remember.
And when to get help: persistent knee pain that does not resolve with a small saddle adjustment, any pain that is sharp rather than achy, numbness that persists after a ride, or discomfort that is clearly one-sided. Those warrant a professional bike fitter or a healthcare professional rather than more self-adjustment.
What should you do before the first cold ride?
A short seasonal checklist saves most of the problems described above, and it takes about twenty minutes once a year.
Measure the stack difference between your summer and winter footwear. Put a summer shoe and a winter shoe on a flat surface and measure the sole thickness under the ball of the foot, then again with the socks you will actually wear. The difference is what you lower the saddle by.
Check and mark your cleats. If you use winter shoes, transfer the position carefully and mark both shoes so you can verify it later. If you use one pair year-round, check the bolts anyway — cleats loosen, and a loose cleat causes exactly the kind of vague knee discomfort that people blame on the cold.
Test your layers on the bike, not standing up. Put the full winter kit on and get on the bike, indoors, and go through the positions you actually use. Reach for the levers with the gloves on. Rotate your shoulders. Get in the drops. A jacket that fails this test will fail on the road, and it is better to know in the garage.
Adjust lever reach if the gloves need it. Two minutes with a hex key.
Check tyre pressure for the season. Colder air means lower pressure, and most riders run too high for wet autumn roads anyway. A few psi lower improves grip and comfort at a cost in rolling resistance most people will never notice.
Sort the lights and the mudguards before you need them, not on the first dark evening. The rider who is fitting a rear light in the dark at the roadside in November is the rider who did not do this in September.
And ride the first cold ride somewhere familiar. You are testing a changed setup on changed surfaces in changed light. A known route removes one variable and gives you a genuine comparison for how the position feels.
TL;DR:
- Winter shoes and socks raise your foot, which effectively raises saddle height — lower it three to five millimetres.
- Bulky jackets restrict shoulder range, which causes most winter neck and upper back complaints.
- Adjust lever reach for thick gloves, and check cleat position whenever you change shoes.
- Record your summer numbers before changing anything, change one thing at a time, and give each change two rides.
Do the twenty-minute seasonal check before the first genuinely cold ride rather than after the first niggle. Almost every autumn cycling complaint is a clothing change that nobody adjusted for. This is general information, not medical advice.
Keep Reading
This article is for general informational and styling purposes only. Fit, sizing, and product availability may vary — check current details before purchasing.