Complete Guide: Why Your Bike Fit Stops Working When You Change Shoes
Quick Answer: Your shoe sits between your foot and the pedal, so its stack height, sole stiffness, footbed thickness, and cleat position are all part of your effective saddle height and fore-aft position. Change the shoe and you change the fit, often by 3 to 8mm - enough to produce knee pain, hot spots, or a saddle that suddenly feels too low. The fix is to measure the difference and adjust the saddle to compensate, and to transfer cleat position by measurement rather than by eye.
This guide covers what changes, how much, how to measure it, and how to reset a fit that has already gone wrong.

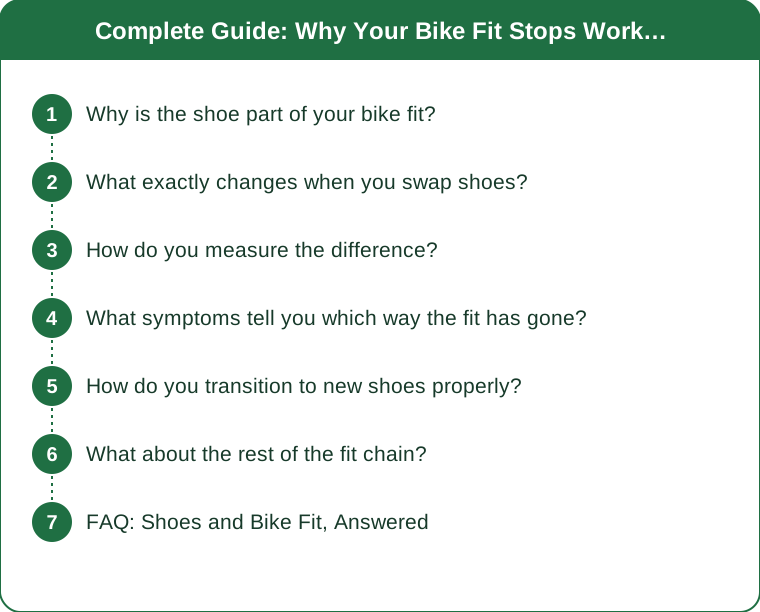
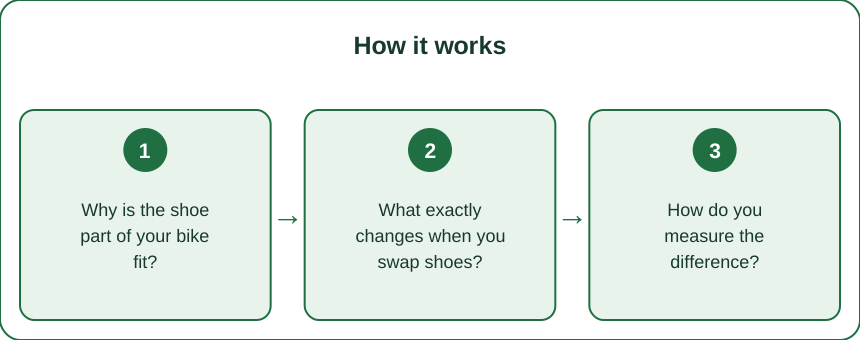
Why is the shoe part of your bike fit?
Because a bike fit is a set of distances between three contact points, and the shoe changes one of them.
Saddle height is not really saddle-to-pedal. What matters physiologically is the distance from your sit bones to the ball of your foot at the bottom of the pedal stroke - which passes through the shoe. Anything that changes the thickness of material between your foot and the pedal axle changes your effective leg extension.
Stack height is the direct measurement of this. It is the vertical distance from the pedal axle to the bottom of your foot inside the shoe, including the sole, the cleat, and the footbed. Between two road shoes, stack height can differ by 5mm or more, and between a road shoe and a mountain bike shoe considerably more.
A 5mm change is not trivial. Bike fitters typically adjust saddle height in 2 to 3mm increments and expect riders to feel it. A 5mm effective change is roughly two adjustment steps - well past the threshold where knees start complaining.
And the change is invisible. Your saddle is at exactly the number it has always been. The measurement you check is the one that did not change, which is why this problem takes people so long to diagnose. They check saddle height, confirm it is correct, and look elsewhere.
The direction matters too. A thicker shoe raises your foot, which effectively lowers your saddle - producing more knee flexion at the top of the stroke and typically anterior knee pain. A thinner shoe effectively raises it, producing hip rocking and often posterior knee or hamstring discomfort. Two different symptom patterns from the same category of mistake.
One more subtlety: stack height differs between shoe sizes within the same model, and between the left and right shoe if you use different footbeds. Most of the time this is small enough to ignore. When you are already at the edge of comfortable, it is not.
What exactly changes when you swap shoes?
Five variables, and most shoe changes alter at least three of them simultaneously.
1. Stack height, as covered. The single largest and most measurable difference. Carbon-soled race shoes tend to be thinner; mountain bike and gravel shoes with recessed cleats and lugged soles are considerably thicker. Moving between categories is where the biggest surprises happen.
2. Footbed thickness. The insole that comes with the shoe, or the custom one you moved over, adds its own height. A supportive aftermarket footbed can add 3 to 4mm on its own - and people frequently move footbeds between shoes without accounting for it, or fail to move them and lose the height they had.
3. Cleat fore-aft position. Even if you measure carefully, the position of the cleat bolt holes relative to your foot differs between shoe models. A cleat set to the same position on the shoe can end up in a different position relative to the ball of your foot, which changes your effective reach and the load on your calf and Achilles.
4. Sole stiffness. A stiffer sole transmits force more directly and flexes less under load. Moving from a flexible sole to a very stiff one changes how force is distributed across the foot and commonly produces hot spots in the first few rides even when everything else is identical.
5. Volume and retention. How the shoe holds your foot changes where your foot sits within the shoe. A shoe that lets your foot slide forward under load effectively lengthens your leg on the downstroke in an inconsistent, ride-to-ride way - which is the hardest version of this problem to diagnose because it is not constant.
And a sixth, seasonally relevant one: sock thickness. Moving from a summer sock to a winter one adds 1 to 3mm, and overshoes add a little more. Most people accept a slightly different feel through autumn without connecting it to anything. It is the same mechanism, at a smaller scale.
How do you measure the difference?
Two approaches - one precise, one practical - and both are better than guessing.
The practical method: the stacked measurement. Put on the new shoe with the sock and footbed you will ride in. Stand on a hard floor and measure from the floor to a fixed reference point on your ankle - the top of the medial malleolus, the bony bump on the inside of the ankle, works well. Repeat with the old shoe. The difference is very close to your stack difference, and it accounts for footbed and sock automatically.
The precise method: measure the shoe. With the cleat fitted, measure from the underside of the cleat contact surface to the top of the footbed inside the shoe at the ball of the foot. Do it for both shoes. This isolates the shoe itself and is the number a fitter would use.
Then adjust the saddle by the difference, in the same direction. Thicker shoe means you raise the saddle by that amount to keep the same leg extension. Thinner shoe means you lower it. This sounds backwards to some people, so it is worth stating clearly: a thicker shoe lifts your foot toward the saddle, so the saddle must go up to restore the distance.
For cleat position, measure from the bony landmark, not the shoe. Mark the position of the first metatarsal head - the bump at the base of your big toe - on the outside of the shoe while wearing it. Set the cleat so the pedal axle sits at or slightly behind that mark. This transfers position correctly between shoes with different hole placements, which copying the old cleat position does not.
Check float and rotation separately. Set the rotational angle of the cleat to match the natural angle of your foot, which you can find by pedalling with the cleat bolts slightly loose on a turbo trainer for a few minutes and then tightening them where your foot settles. Rotational error is the most common cause of new-shoe knee pain that is not stack-related.

What symptoms tell you which way the fit has gone?
The pattern of discomfort points fairly reliably at the direction of the error.
Effective saddle too low (thicker shoe, unadjusted): front-of-knee pain, usually around or below the kneecap. More knee flexion at the top of the stroke loads the patellofemoral joint. Often accompanied by a feeling of being cramped and a tendency to slide back on the saddle.
Effective saddle too high (thinner shoe, unadjusted): back-of-knee discomfort, hamstring tightness, and hip rocking side to side at the bottom of the stroke. Numbness in the toes is common too, because you unconsciously point the foot to reach.
Cleat too far forward: calf fatigue and Achilles soreness. The further forward the cleat, the more the calf has to stabilise the ankle on every stroke. This is the classic result of transferring cleats by eye between shoes with different hole positions.
Cleat too far back: reduced power feel and sometimes a sense of pedalling flat-footed, though it is generally better tolerated than too far forward.
Cleat rotation wrong: pain at the inside or outside of the knee, often only on one leg. This is the single most common new-shoe complaint and the easiest to fix.
Hot spots and numbness under the ball of the foot: usually sole stiffness, shoe volume, or a footbed that does not support the arch. Distinct from fit geometry - the fix is footbed and shoe fit, not saddle height.
And a general rule about timing: fit-related problems typically appear on the second or third ride, not the first. The first ride is masked by novelty and adrenaline. If a new shoe felt fine on day one and hurt on day three, that is a fit signal, not a fluke.
How do you transition to new shoes properly?
A sequence that avoids most of the problems entirely.
Step 1: Measure before you ride. Do the ankle-height comparison described above with both shoes, socks on, footbeds in. Two minutes, and it tells you exactly how much to change.
Step 2: Set cleat fore-aft from your foot, not the old shoe. Mark the first metatarsal head, set the axle at or just behind it. Start slightly rearward rather than forward if you are unsure - it is better tolerated.
Step 3: Set rotation on a trainer. Bolts finger-tight, pedal easy for five minutes, let the foot find its angle, tighten. This one step prevents most new-shoe knee pain.
Step 4: Adjust the saddle by the measured difference. All at once if the number is small, or split into two adjustments a few rides apart if it is more than about 5mm - large changes are better absorbed gradually.
Step 5: Ride short and easy first. Two or three rides of under an hour at moderate effort. Do not test new shoes on a long ride or a hard session, which is exactly when people discover a 6mm error the painful way.
Step 6: Adjust in 2mm increments only. If something is not right, change one thing by a small amount and ride again. Changing saddle height and cleat position simultaneously means you learn nothing from the result.
Step 7: Write it down. Saddle height, setback, cleat position measured from the shoe’s heel, and the shoe model. A note on your phone saves an hour of frustration next time, and it lets you return to a known good position if an experiment goes wrong.
Seasonal note: autumn is when many riders switch to winter shoes or add overshoes and thicker socks, which is exactly this problem in miniature. If your knees start complaining in October and nothing else changed, check what is on your feet.
What about the rest of the fit chain?
Shoes are the most overlooked variable, but they are not the only one that drifts.
Saddles wear and change shape. Foam compresses over thousands of kilometres, which lowers your effective sit-bone height by a few millimetres. A saddle at two years is not the saddle you fitted to, and replacing it with an identical model resets the height you had gradually adapted to.
Pedals differ in stack too. Different pedal systems have different axle-to-cleat-interface distances - the range between common systems is several millimetres. Changing pedal brand is the same category of change as changing shoes and needs the same measurement.
Shorts thickness matters, slightly. Chamois padding varies, and a substantially thicker winter short raises you a little. Small enough to ignore alone, meaningful when stacked with winter shoes and thicker socks.
Tyre size changes bottom bracket height, which changes nothing about the fit between the three contact points but does change stand-over and handling. A common false alarm - moving from 25mm to 32mm tyres does not change your saddle height requirement.
And your body changes. Flexibility, core strength, and injury history all shift what fits. A fit that was correct three years ago may not be correct now, and the honest answer to persistent discomfort with a correctly measured fit is that the fit itself may need revisiting.
When to see a professional fitter: persistent pain that survives careful adjustment, pain that is asymmetric between legs, numbness that does not resolve, or any return from an injury. A good fit session is worth considerably more than a new component, and it is the correct next step when measurement has not solved it.
This is general information, not medical advice. Persistent knee pain, numbness, or any pain that worsens over consecutive rides is worth having assessed by a professional rather than adjusted around indefinitely.
FAQ: Shoes and Bike Fit, Answered
How much can shoe stack height actually differ?
Between two road shoes, commonly a few millimetres. Between a thin carbon road shoe and a lugged gravel or mountain bike shoe, the difference can be substantially larger. Either way it is worth measuring rather than assuming.
Do I raise or lower the saddle with thicker shoes?
Raise it. A thicker shoe lifts your foot closer to the saddle, so the saddle must go up by the same amount to restore your leg extension.
Can I just copy my old cleat position?
Not reliably. Bolt hole positions differ between shoe models relative to your actual foot. Measure from the bony landmark at the base of your big toe instead - that is what stays constant.
Why do my knees hurt only on new shoes?
Most often cleat rotation, followed by stack height change. Set rotation on a trainer with bolts finger-tight and let your foot find its natural angle before tightening.
Does sock thickness really matter?
One to three millimetres, which is small but real - and it stacks with winter shoes and overshoes. If autumn brings unexplained knee discomfort, that combination is a reasonable first suspect.
Should I change saddle height and cleat position at the same time?
No. Change one variable, ride, and assess. Changing both means you cannot tell which adjustment helped or hurt.
When is it worth paying for a professional fit?
Persistent pain after careful self-adjustment, asymmetric pain, numbness that does not resolve, a new bike, or a return from injury. Those are the situations where a fitter earns their fee quickly.
TL;DR:
- Your shoe is part of your bike fit - stack height, footbed, sole stiffness, and cleat position all sit between your foot and the pedal.
- Changing shoes can shift effective saddle height by 3 to 8mm, which is two or three adjustment steps and enough to cause knee pain.
- Thicker shoe = raise the saddle. Thinner shoe = lower it.
- Symptom map: front-of-knee pain means effectively too low; back-of-knee and hip rocking means too high; calf and Achilles soreness means cleat too far forward.
- Transfer cleat position from the bony landmark at the base of your big toe, not from the old shoe’s hole positions.
- Set rotation on a trainer with bolts finger-tight, adjust in 2mm increments, and change one variable at a time.
- Winter shoes, thick socks, and overshoes are the same problem in miniature - a common cause of unexplained October knee pain.
The number you always check - saddle height - is the one that did not change. Measure the shoe, and the mystery usually resolves in ten minutes.
This is general information, not medical advice.
Keep Reading
This article is for general informational and styling purposes only. Fit, sizing, and product availability may vary — check current details before purchasing.